Torrent Suite SoftwareAdministration Guide
Torrent Suite Software space on Ion Community
Configure Torrent Suite Software
Torrent Suite Software works out-of-the-box.
Configuration tab
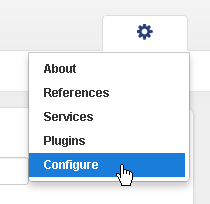
Some configuration tasks use the Linux command line and some use the Torrent Browser configuration tab. To access the Torrent Browser configuration tab, use the gear menu near the top right of a Torrent Browser page and select Configure :
Configure disk space notification email address
The Data Management system can automatically notify you when available disk space on a Torrent Server disk partition becomes low. However, in order to receive these notifications, you must configure an email address in the Data Management system . See Data Management Configuration for instructions (search for Email).
Configure contact information
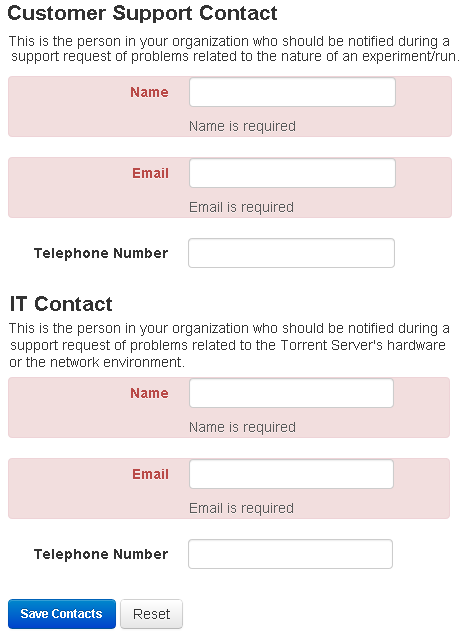
Add the name, email address, and phone number of the person responsible for the server and of an I.T. contact person, and click the Save Contacts button:
Change the hostname
Use the following commands to change the hostname:
sudo TSconfig --change-hostname
Add an HTTP proxy
Use the following command to add an HTTP proxy:
sudo TSsetproxy
Set the proxy address and authentication according to the following prompts:
-
Enter http proxy address:
Enter the proxy address. (If no address is entered, you are prompted to exit the program.) -
Enter http proxy port number [3128]:
Enter a port number or carriage return to accept the default, 3128, port number. -
Enter the username for proxy authentication:
Enter a username. If you do not enter a username, no authentication is set. -
Enter the password for proxy authentication:
Enter a password. If you do not enter a password, no authentication is set.
A proxy address confirmation message is displayed:
http_proxy is set to http://username:password@proxyAddress
The recommended usage is to enter the command sudo TSsetproxy, as shown above, and be prompted for each value. You can however use the TSsetproxy arguments instead:
             Usage: TSsetproxy [option]...

    --address         Proxy address (example: 'http://proxy.net')
    --port            Proxy port number (default: 3128)
    --username        Username for authentication
    --password        Password for authentication
    --remove          Removes proxy setting
    --debug,-d        Prints script commands when executing (set -x)
    --demo            Prints what changes would be executed only.  No changes are made
    --help,-h         Prints command line args
    --version,-v      Prints version
Configure HTTPS
The Torrent Server is shipped with a self-signed SSL certificate that allows you to enable HTTPS quickly but provides a limited degree of security. Torrent Suite Software administrators who are interested in securing the connection further should read the Ubuntu Server Guide on Certificates and Security, and investigate getting either an SSL certificate signed by their organization or a trusted Root Certificate Authority.
For more information on the level of security provided by Ubuntu, see the following site for 10.04:
https://help.ubuntu.com/10.04/serverguide/certificates-and-security.html
or for 14.04:
https://help.ubuntu.com/14.04/serverguide/certificates-and-security.html
.
With a self-signed SSL certificate, each user sees an error message on his or her first visit to the site and is asked whether or not to trust the certificate.
See also the following apache file for information. This file is installed on your Torrent Server as
/etc/apache2/sites-available/torrent-server-ssl.example
:
# So, you want to configure HTTPS...
# [Optional] consider creating and signing your own ssl-cert,
# and replace the 'snakeoil' cert below.
# Copy this file to torrent-server-ssl, edit as needed [[ NB: Step missing in current file... ]]
cd /etc/apache2/sites-available
sudo cp torrent-server-ssl.example torrent-server-ssl
# To activate this vhost:
sudo apt-get install libapache2-mod-gnutls ssl-cert
sudo a2enmod ssl
sudo a2dissite default-ssl ## should already be disabled, but just in case
sudo a2ensite torrent-server-ssl
sudo service apache2 restart
# [Optional] If you want to block access by plain http,
# you can disable the default site.
# This may block Ion PGM Sequencer access to the Torrent Server.
# Disable at your own risk.
# echo "I'm sure I want to do this." && sudo a2dissite torrent-server
# [Optional] Enable http site which redirects to https, forcing https access
# a2ensite force-torrent-server-ssl
Change the timezone
Use the following commands to change the timezone:
sudo TSconfig --configure-timezone
Configure Postfix for nightly email
Preparing Site IT
Adding Email Recipients
Adding Web Root and Site Name to Admin and Global Config
Scheduling the Mail Task (cron job)
Configure Postfix
Postfix is a Linux mail server ("post office") program. It is open-source software and was not designed by Ion Torrent. It is more similar to Exchange than Outlook software in that it is an e-mail server, not an e-mail client. Postfix is designed to work on various infrastructures, so there are many configuration options for IT administrators to adjust mail routing parameters.
You can find the official Postfix documentation here: http://www.postfix.org/documentation.html .
Prepare site IT
It is useful to confirm the following with the site IT administrator:
- Outbound email from the server is allowed Many sites block the ability for machines to send an e-mail message directly to a mail server because this is a common avenue for virus propagation. If the site has such a restriction in place, the IT administrator may need to make an exception for this server.
- Ideally, the domain is configured with a default "MX record" The "MX record" is the mail exchange information that automatically knows how to handle any email generated from the Torrent Server. If this is not in place, the nightly email might not work.
Add email recipients
You are cautioned to only add a couple of recipients while testing.
Follow these steps enter destinatione-mail addresses.
Add Web Root and Site Name to Admin and Global Config
Make certain these fields are configured in the database so they will show up correctly on the e-mail message:
-
Click the Torrent Browser gear menu and select
Configure
.
-
Scroll down to the Database Administration section and click
Admin Interface
. If prompted to log in, use your
ionadminaccount. -
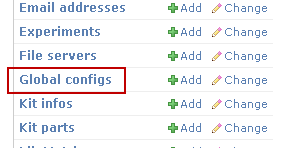
Click on
Global configs
:
-
Make certain a value is entered in the
Web root
field and the
Site name
field, as shown in the example:

The value for Web root should be the main URL that people use to access this Torrent Browser from the desktop.
Schedule the Mail Task (cron job)
The
cron
program is the Linux program that automates tasks to run on a schedule. By default, a
cron
job is installed in the Torrent Server to run at 6AM, daily. You can verify this by logging in as
ionadmin
and typing the command:
crontab -l
.
             ionadmin@kauai:~$ crontab -l
0 6 * * * /opt/ion/iondb/bin/runnightly.sh
Notice, all cron calls the runnightly.sh script at 6AM.
As a test, without having to wait until 6AM,you can invoke the same script manually from the command-line and see if it generates an e-mail:
/opt/ion/iondb/bin/runnightly.sh
If you forgot to enter the Web root setting, you will an error similar to the following:
             ionadmin@kauai:~$ /opt/ion/iondb/bin/runnightly.sh
Traceback (most recent call last):
  File "nightly.py", line 70, in <module>
    main(sys.argv)
  File "nightly.py", line 67, in main
    send_nightly()
  File "nightly.py", line 49, in send_nightly
    if web_root[-1] == '/':
IndexError: string index out of range
Configure Postfix
There is no way to know it advance what Postfix configuration settings work for a particular site. The following example procedure shows basic configuration settings that have worked for the servers configured to date.There is no guarantee that these steps work for every situation. If email is still not appearing, you almost certainly require assistance from the site IT administrator, who may or may not have experience with Postfix.
This configuration can be re-executed at anytime:
-
Go to the Linux command line and start the Postfix configuration utility:
sudo TSconfig --configure-postfix -
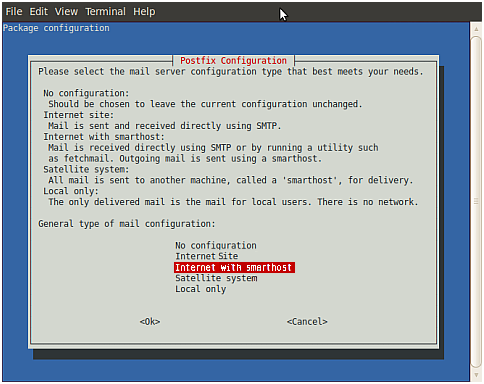
Select the type of mail configuration. Typically,
Internet with smarthost
.
-
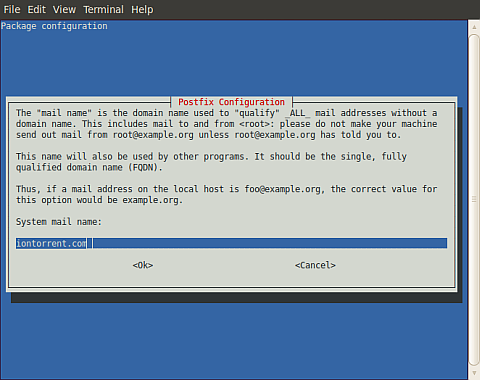
For
System mail name
, enter the site domain name. This domain needs to be configured with a default "MX" (mail exchange) record.
-
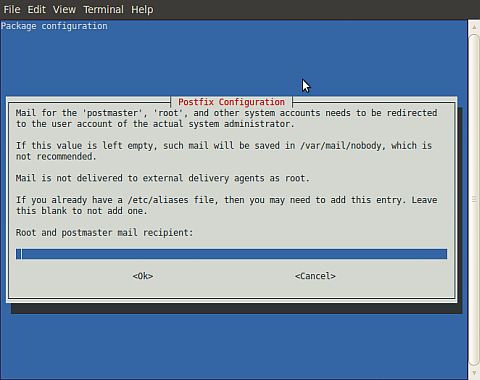
Leave
mail recipient
blank.
-
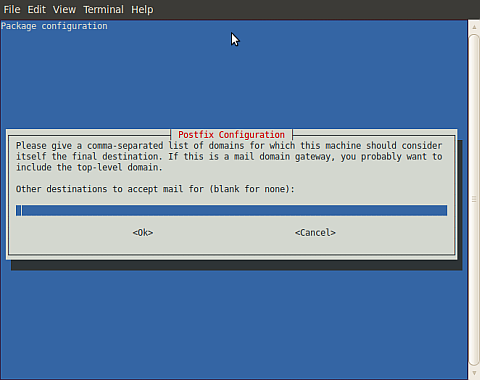
Leave
other destinations
blank.
-
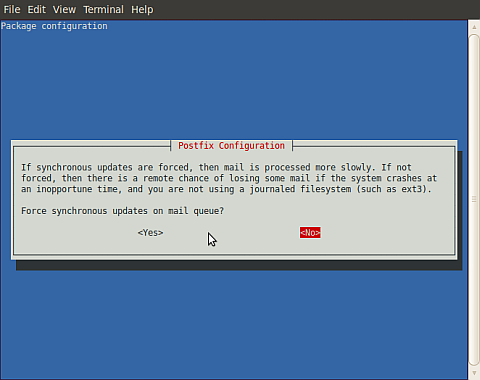
Set
Force synchronous updates on mail queue
to
<No>
.
-
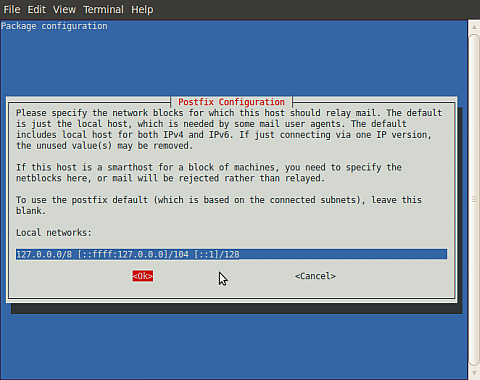
For
Local networks
, accept the default, and select
<OK>
.
-
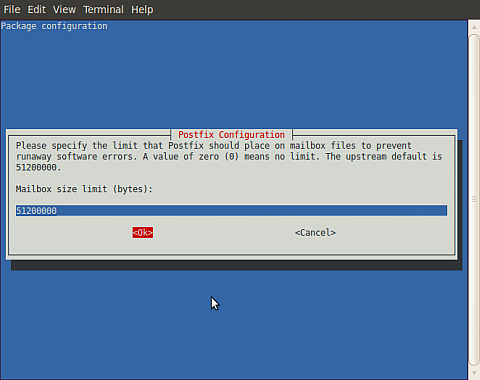
For
Mailbox size limit
, it is recommended that you not have no limit, so enter "51200000" to not consume all disk space.
-
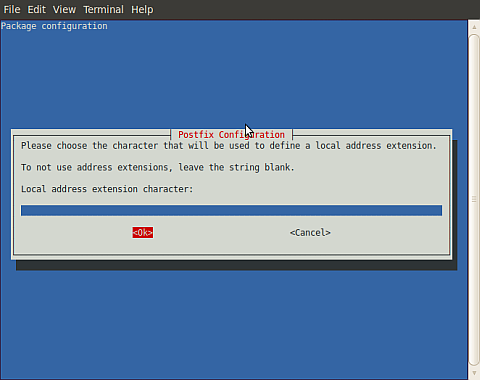
Leave
Local address extension character
blank.
-
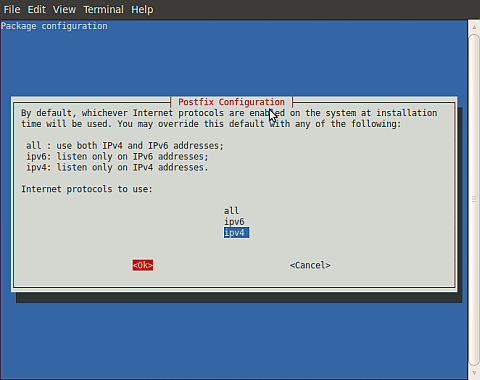
For
Internet protocols to use
, accept the default and select
<OK>
.
- After the last screen, the console returns to text mode and displays the status of the Postfix configuration files update.
             Running newaliases
* Stopping Postfix Mail Transport Agent postfix            [ OK ]
* Starting Postfix Mail Transport Agent postfix            [ OK ]
root@kauai:~# sudo dpkg-reconfigure postfix
* Stopping Postfix Mail Transport Agent postfix            [ OK ]
setting synchronous mail queue updates: false
setting myorigin
setting destinations:
setting relayhost:
setting mynetworks: 127.0.0.0/8 []/104 []/128
setting mailbox_size_limit: 51200000
setting recipient_delimiter:
setting inet_interfaces: all
setting inet_protocols: ipv4
WARNING: /etc/aliases exists, but does not have a root alias.

Postfix is now set up with the changes above.  If you need to make
changes, edit /etc/postfix/main.cf (and others) as needed.  To view
Postfix configuration values, see postconf(1).

After modifying main.cf, be sure to run '/etc/init.d/postfix reload'.

Running newaliases
* Stopping Postfix Mail Transport Agent postfix            [ OK ]
* Starting Postfix Mail Transport Agent postfix            [ OK ]
This completes Postfix configuration.
 Torrent Suite™ Software Administration Guide
 Deploy Your System
 Prepare Your Site
 Install the Server
 Network Connectivity
 Update Torrent Suite™ Software
 Install Analysis Plugins
 Configure Torrent Suite™ Software
 Verify Functionality
 Manage Sequencer Settings from the Torrent Browser
 Monitor Free Disk Space
 Back Up and Restore Data
 Mount a USB Drive
 Boot Into Single-User Mode
 Install and Use a UPS
 Axeda® Remote System Monitoring (RSM)
 Configure Chips
 Configure Experiments
 Configure Global Configs
 Configure Users
 Approve User Account Requests
 Configure Basecaller Default Parameters
 Upgrade Your Torrent Server Ubuntu® Software
 View Network Settings
 Shutdown Server
 Use a Torrent VM to Evaluate a New Torrent Suite™ Software Release
 Update Server
 Update the Ion OneTouch™ Device
 Manage your SGE Cluster with QMON
 View System Support Diagnostics
 View Instrument Diagnostics

